By Dana Gallinger
Supplies:
9” Balloons
2 lbs Beeswax (leaves plenty left for other projects)
Double boiler, slow cooker or stainless pot
Parchment paper
Process:
Gather materials

Fill balloon with warm water. Fill them to the size that you want your luminary to be. They should be full enough that they are plump and taut.

Heat your beeswax to 160 – 170F. You can use a cooking pot on low heat or a double boiler out of two pots. Be prepared to donate the wax pot to wax forever more as it is a headache to clean it out.
Melt the wax on high, and then turn it to low before you set to work. No thermometer? No worries here are some common issues that relate to temperature:
- Is the wax sticking smoothly to your balloon? Then the temperature is just right.
- Is the wax lumpy? Too cool!
- Is the wax melting the previous layer off when you re-dip? Too hot!
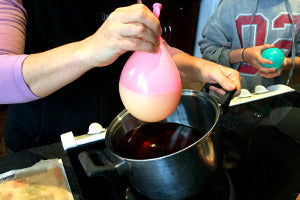
Dip your balloon repeatedly making sure not to dip beyond the water/air line. Every six dips or so gently place the balloon on a piece of parchment paper to flatten the bottom. Allow for 5-10 seconds for the wax to cool before dipping it into the wax again.

After around 20-30 dips, gently place your balloon on the parchment and allow it to cool. The aim is to make the walls of the luminary thick enough to hold up to use but thin enough to allow light through. Experiment!

Once the wax feels firm to the touch, but still warm take the balloon over to the sink and pop it and discard the broken balloon. While the luminary is still warm trim the edge with sharp knife.


1 comment
Rather than put the tea light in a cup, I put about 2 tablespoons of sea salt in the luminary and sit the tea light on top. This helps to disipate the heat and the luminary does not melt. Works for me.